Laundry Makeover on a Budget
I decided to do a laundry room makeover. Since I was told it would be hard, guess what I did? I was convinced to remodel the laundry with my husband.
First, I knew I wanted to have a tile, and despite being told I couldn’t do it myself, I decided to try. Was it easy? Not, but it was worth it.
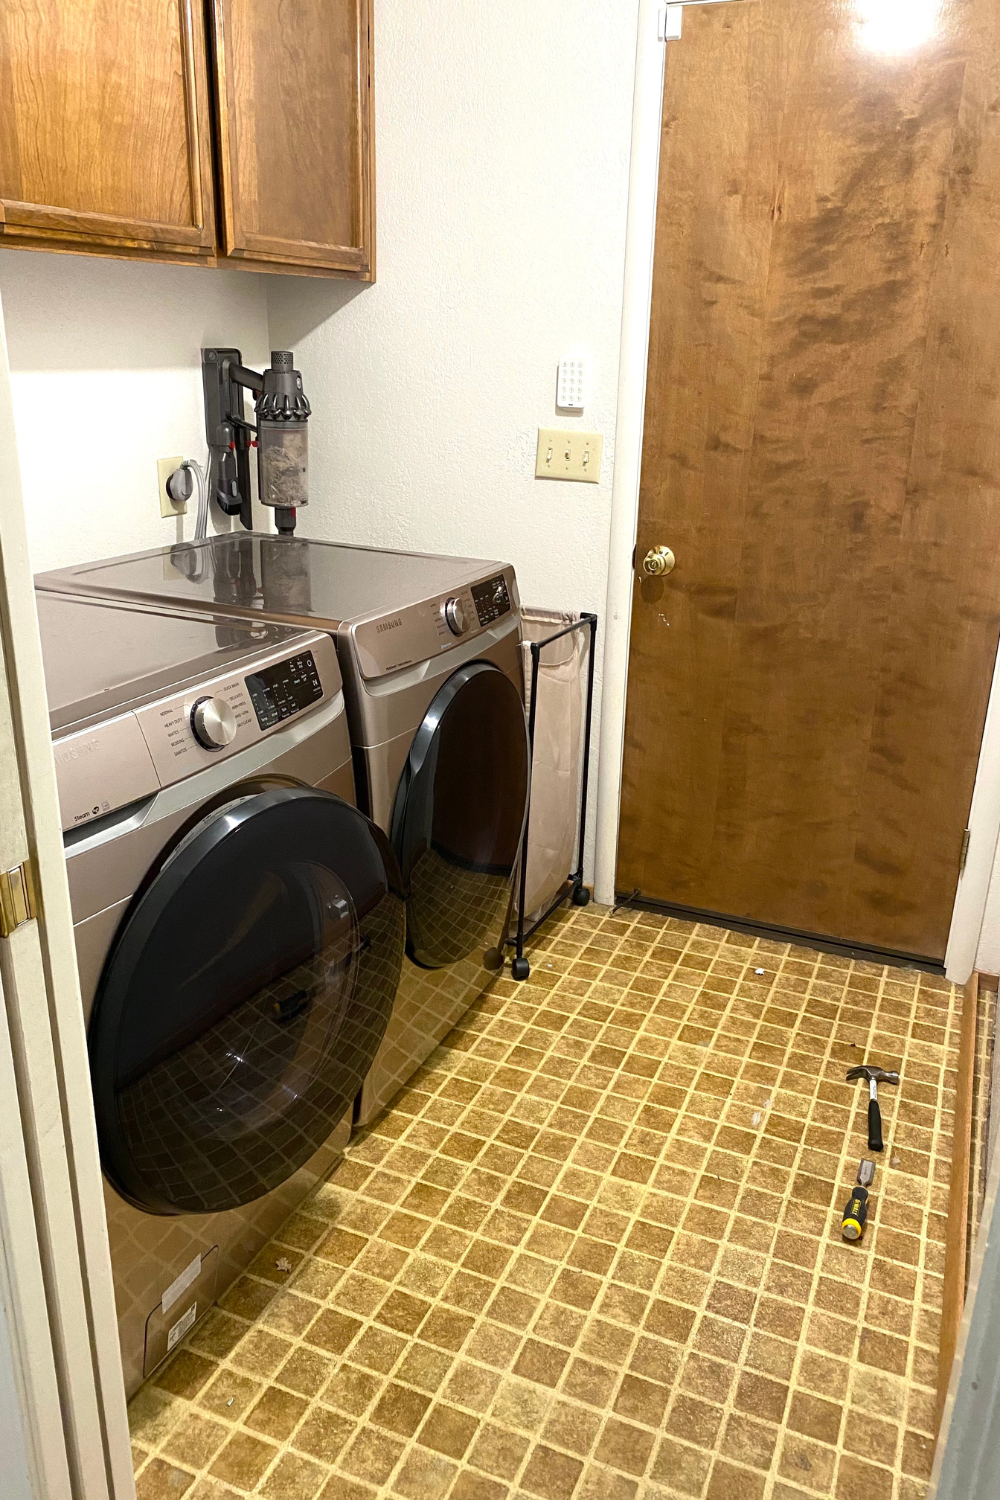
Below is the image of the laundry before the countertop was installed. Scroll down to see the complete laundry room complete.
Floor Materials and Supplies
Tile HERE
Thinset (Mortar) HERE, there are many options. You need to use the one that is good for your tile choice.
Grout Float, there are many options available, but I go for the cheapest.
Square Notch; choose a size based on the tile you use. Smaller tile requires smaller spacing.
Sponge, used after grouting.
Spacers: there are many options based on the spacing you are looking for between the tiles.
Wet Saw
Laser Level
Knee Pads
Tools and others are linked HERE.
Find some of the accessories linked HERE.
Doing the floor makes such a big difference, and I love it. It looks professionally made (my first time) and so chic. I watch many youtube videos before installing the floor. My husband helped with the cutting; I did the rest.
Ensure you measure and plan because once you put the thin-set, the drying process will start, and cutting the end pieces takes time. Planning the whole floor is something I will do for my next project.
Painting
There are so many color choices. I looked online for inspiration but went to Lowes and picked the colors myself. Surprisingly I love the way it turned out. Each paint was about $50, so I had no plans of having tryouts.
Cabinets Makeover
When it came to the cabinets, I tried to avoid ordering new ones because they would cost a lot. Since I do all my projects on a budget, I had to work with what I had. I tried KILZ 3 Premium Primer.
I did two coats, and it looked great. Below is the image with one coat only.
To be able to paint the outer part of the cabinets and the doors, I had to sand them. I used some sand papers (140, 160, and 220 to make it smoother). Be careful with the lower numbers because it takes the top coat fast and, if you continue, may damage the wood design. Always finish with 220 for a smoother finish.
My sander is DeWalt, and I have no complaints whatsoever. The sanding discs I used were affordable and in various sizes, so I could pick and choose based on what I did.
Everything I mentioned is linked HERE.
When it comes to rollers and brushes, I’m pretty bad at keeping the pricy clean, so I go for a bit cheaper and don’t get upset if I have to throw them away. Cleaning brushes and roller wastes a lot of clean water. This is a good option for brushes and roller sets.
Wall Design
Now let’s talk about the wall. There are so many options, and I went back and forth about which design to do. Everything you decide to do will look better than a bare wall. I had some issues with the math part and called my hubby to help, and still, we messed it up more times than I would like to admit.
It made me rethink whether I should even do it, but we finally figured it out. As for the material, I chose the cheapest option (not wood) and paid the price for it. It is harder to fill and sand just because this is not wood. It still looks good, even though I go for perfection.
Below is the material I used for the wall.
Supplies and Tools
My husband and I used Miter Saw. If you are not planning on buying the Miter Saw, get a Circular Saw and nail gun. Also, you need a caulking gun, caulk, and wood filler. Everything is linked here.
Budget-friendly accessories – Light fixture, hangers, cabinet door knobs, bathroom fan linked HERE.
There are a lot of products, but you always have the option of not buying the big tools and instead getting something smaller. I got the big tools because there were many projects I did and still do, and it just makes sense in my case.
This blog post contains affiliate links; I get a small portion of a sale but at no cost to you. This is how I support my blog.
Thank you for reading Laundry Makeover on a Budget, and look out for my best post.


